
Cloudflare Turnstile is a smart, privacy-focused alternative to traditional CAPTCHAs. It helps keep bots away from your website forms while ensuring your real visitors have a smooth, frustration-free experience.
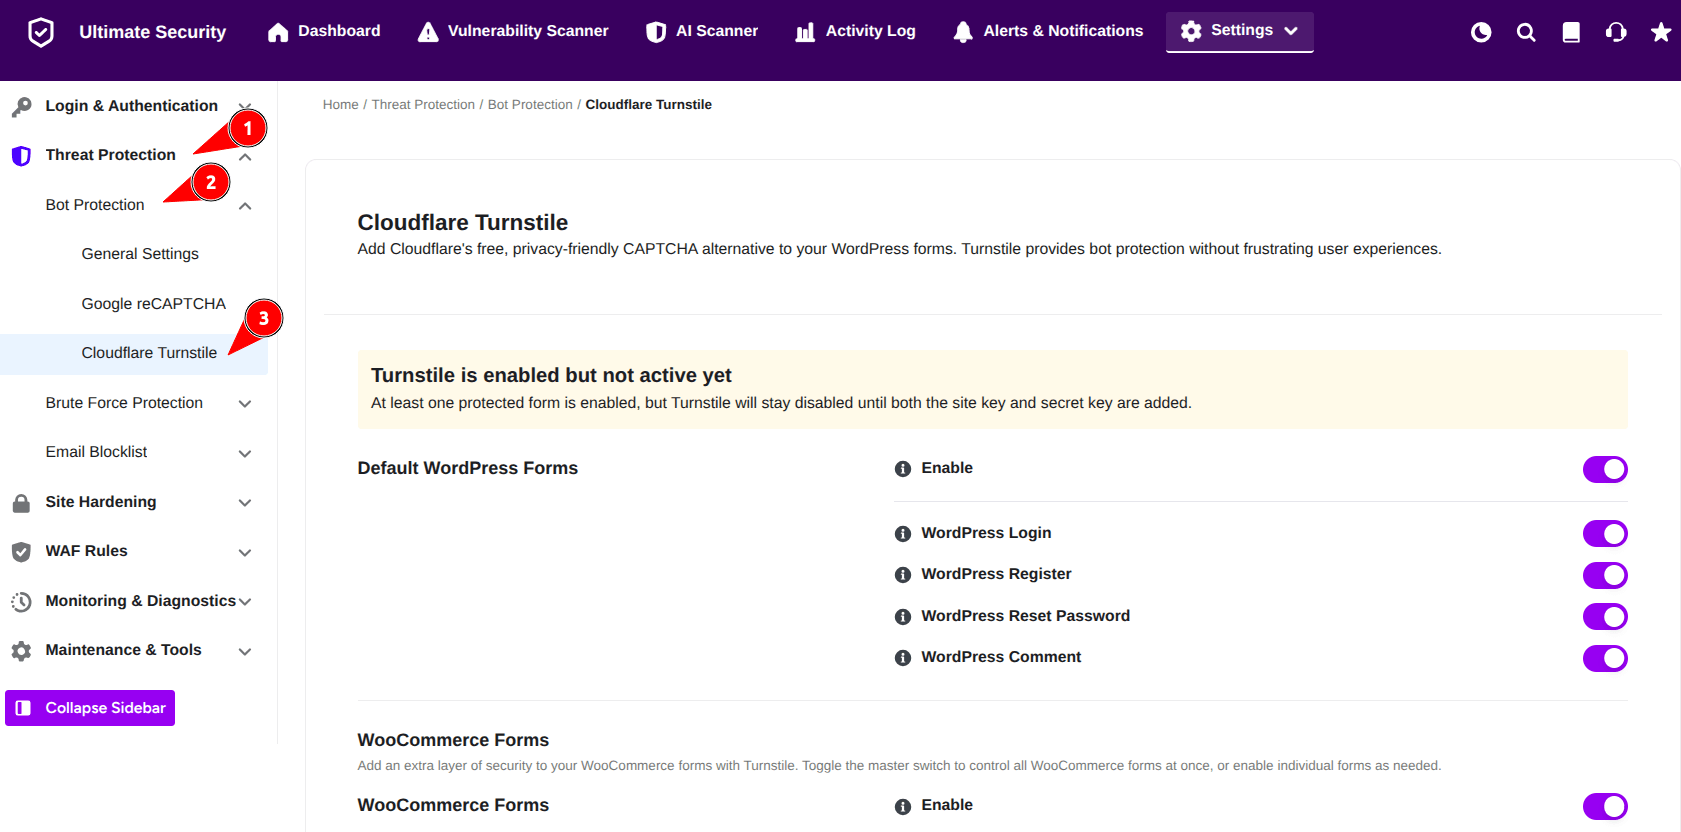
Default WordPress Forms
You can choose exactly where you want to add this layer of protection. Under the Default WordPress Forms section, you will see a list of key areas on your site that are prime targets for automated spam bots.You can toggle the switch next to each form to enable protection:
- Master Toggle: Use the primary “Enable” switch to turn Cloudflare Turnstile protection on or off for all default WordPress forms simultaneously.
- Individual Form Protection: You can also toggle protection for specific forms individually, depending on your security needs:
- WordPress Login: Enable this to protect your login page.
- WordPress Register: Toggle this to secure your user registration process.
- WordPress Reset Password: Enable this to add protection to the password reset flow.
- WordPress Comment: Toggle this to stop spam in your website’s comment section.
WooCommerce Forms
If you are running an e-commerce store, protecting your checkout and account pages is essential. The Cloudflare Turnstile integration allows you to add an extra layer of security to your WooCommerce-specific forms, ensuring that only genuine customers can interact with your store. You have full flexibility in how you apply this security. You can manage these settings using the WooCommerce Forms section:
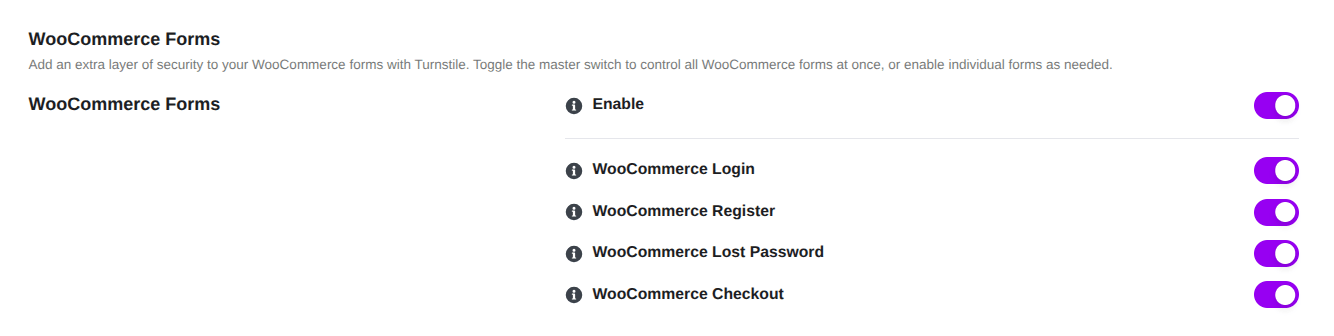
- Master Switch: Use the top “Enable” toggle to quickly turn protection on or off for all WooCommerce forms at once.
- Individual Control: If you prefer to protect only specific areas, you can use the individual toggles to enable or disable Turnstile for:
- WooCommerce Login: Protects customer account access.
- WooCommerce Register: Prevents fake customer account creation.
- WooCommerce Lost Password: Secures the account recovery process.
- WooCommerce Checkout: Adds a vital security step to your purchase process to stop bot activity.
Enter Your Keys (Site Key & Secret Key)
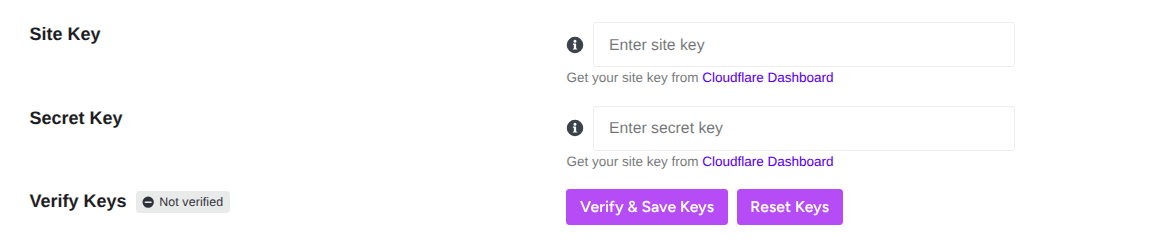
To activate Cloudflare Turnstile on your WordPress site, you must connect the plugin to your Cloudflare account using two specific keys. These keys act as a secure bridge that allows our plugin to communicate with Cloudflare’s verification service. Get your keys from the Cloudflare Dashboard. You have to log in to have these keys
How to Add and Verify Your Keys
- Obtain Your Keys: If you do not already have them, click the Cloudflare Dashboard link provided under the input fields to generate your unique Site Key and Secret Key.
- Enter Keys: Copy and paste your Site Key and Secret Key into their respective fields.
- Verify & Save: Once both keys are entered, click the Verify & Save Keys button. The system will confirm the connection, and the status label will update from “Not verified” to indicate your keys are active.
- Reset: If you ever need to change your keys, you can click the Reset Keys button to clear the current entries and start the process again.
Once the keys are verified, you will notice a Green Badge indicating “Verified.”
General Settings
These settings control how the Turnstile check looks and works on your site.
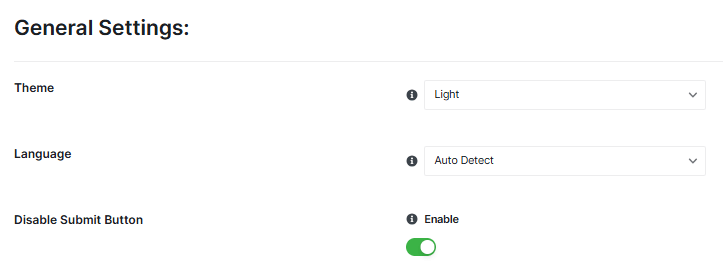
- Theme: You can choose between “Light” and “Dark” themes. Pick the one that matches your website’s look.
- Language: You can let the plugin automatically detect the language, or you can choose a specific language for the Turnstile check.
- Disable Submit Button: This option can stop people from submitting a form until they pass the security check. It’s usually a good idea to leave this “Enable.”
Advanced Settings
These are for more experienced users, but you can still use them
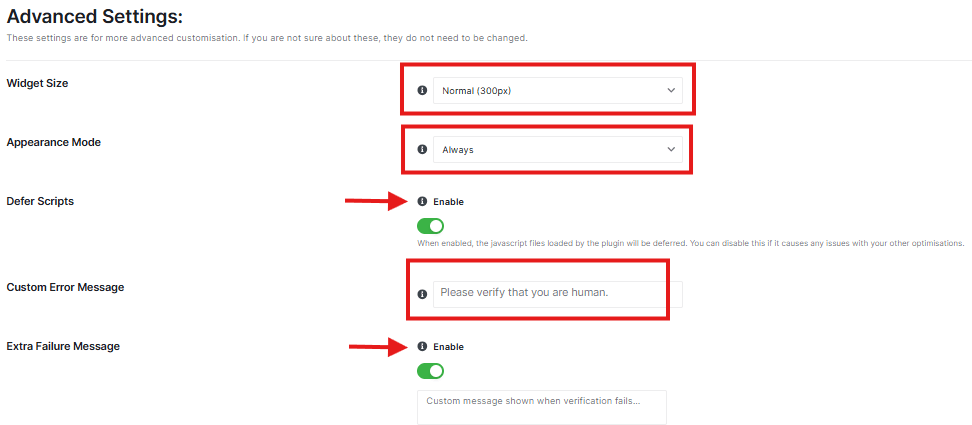
- Widget Size: Choose the size of the security check.
- Appearance Mode: Choose when the security check appears. “Always” means it will always be there.
- Defer Scripts: This can make your website load faster. It’s usually best to leave this “Enable.”
- Custom Error Message: If someone fails the security check, you can show them a special message. The default is “Please verify that you are human.”
- Extra Failure Message: Add another message if the check fails. It’s usually best to leave this “Disable.”
Whitelist Settings
This lets certain people skip the security check.
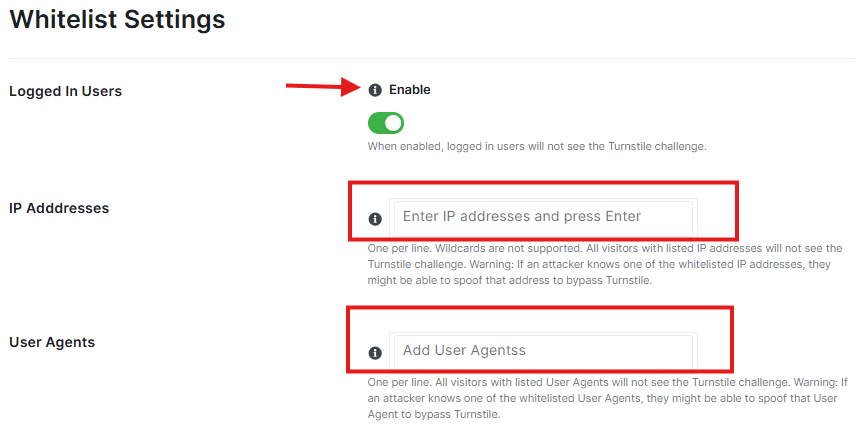
- Logged In Users: If you “Enable” this, people who are logged into your website won’t see the security check.
- IP Addresses: You can add IP addresses here. If you add an IP address, anyone using that address won’t see the security check.
- User Agents: You can add “User Agents” here. This is like a browser’s name. If you add a User Agent, anyone using that browser won’t see the check.
Turnstile Logs
If you “Enable” this, the plugin will keep a record of when the security check is used.
Don’t forget to click the “Save Changes” button at the bottom of the page.
How to Check if it’s Working
After you click Save Changes, it’s a good idea to make sure the protection is active on your site. Follow these two simple steps:
Open your site in a “Private” window
Since you are already logged in as an “admin”, the security check might not show up for you. To see what your visitors see:
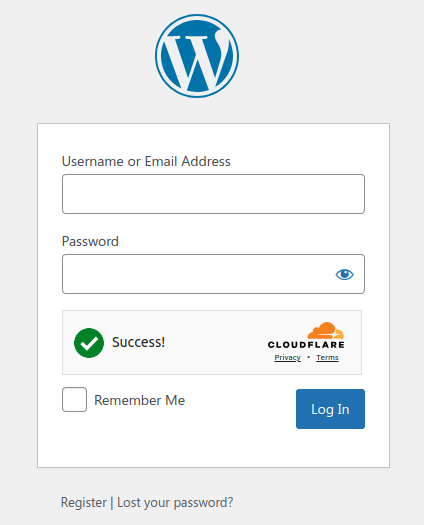
- Open a new Incognito or Private window in your browser (usually by pressing Ctrl + Shift + N).
- Go to your website’s admin login page.
- Look for the Cloudflare Turnstile box in the login form
If you see that check, your site is now protected with Turnstile


