
Cloudflare Setup
Enable WAF Rules and connect your Cloudflare account with an API token, an email and Global API Key, or a self-managed OAuth application.
On this page
To use the WAF (Web Application Firewall) features, you must first link Ultimate Security with your Cloudflare account. This allows the plugin to manage your security zones and deploy protective rules automatically.
Enable WAF Rules
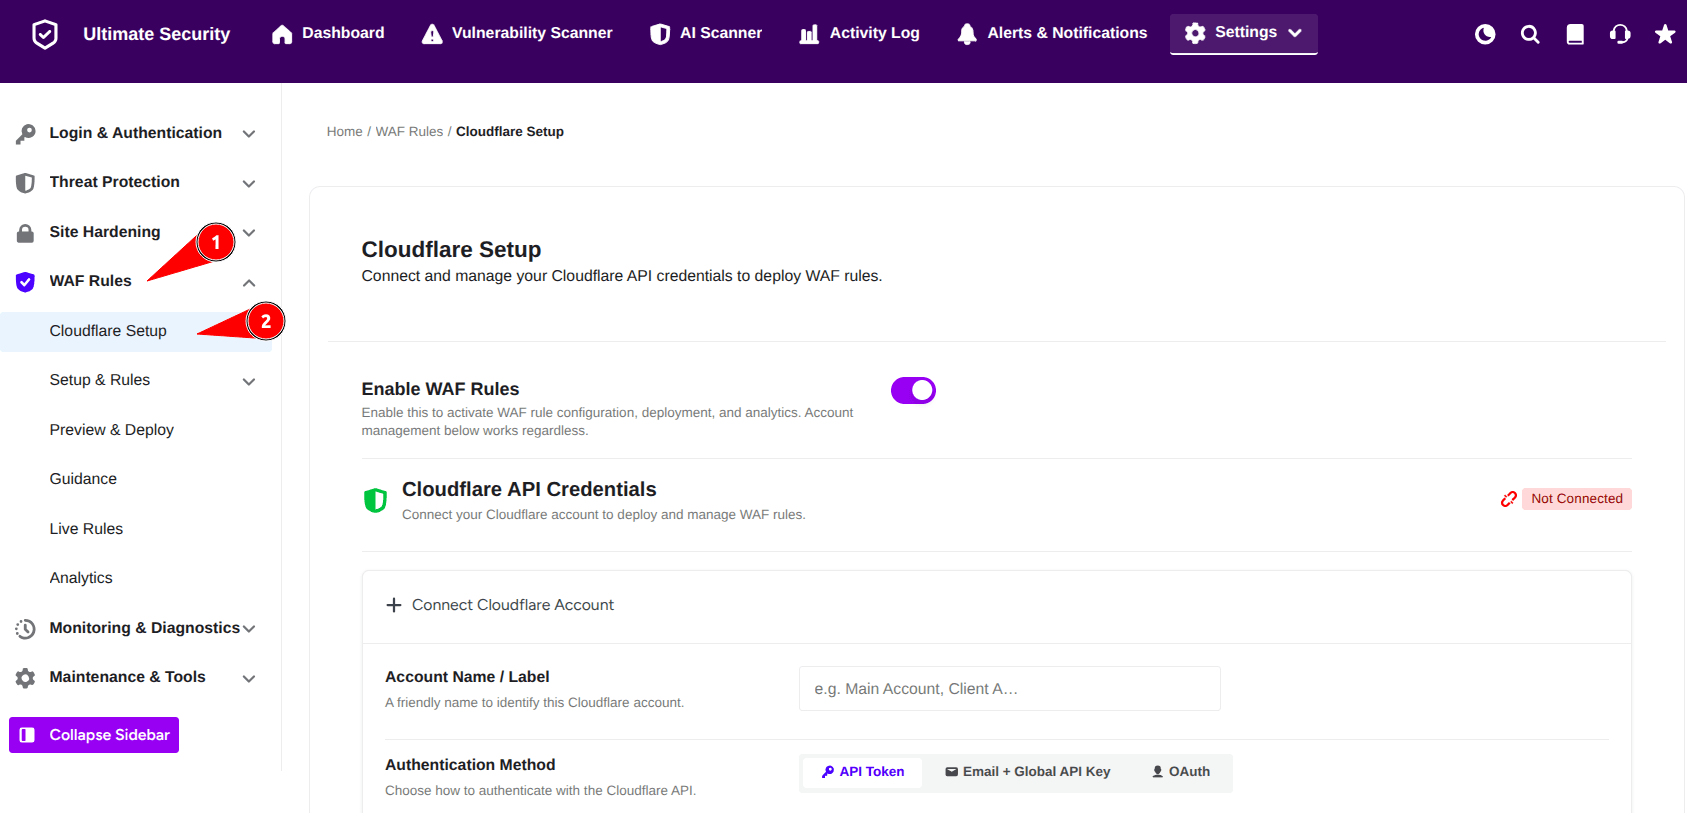
Before configuring your connection, you must activate the WAF rule management engine within the plugin. Enabling this allows the plugin to handle rule deployment, configuration, and traffic analytics.
How to Enable It
- Navigate to Ultimate Security → WAF Rules → Cloudflare Setup from your WordPress admin sidebar.
- Locate the Enable WAF Rules toggle switch.
- Click the toggle to turn it on.
Connecting Your Cloudflare Account
To manage your rules, you need to link your Cloudflare account under the Connect Cloudflare Account section. First, provide a general label for your reference:
- Account Name / Label: Enter a friendly name to identify this specific Cloudflare account (e.g., “Main Account” or “Client Admin”).
Next, choose one of the three authentication methods below to complete the connection.
Method 1: API Token
What It Is
The API Token method is the most secure way to connect your site to Cloudflare. Instead of exposing your master password, it uses a scoped token that grants our plugin only the specific permissions required to deploy WAF rules.
How to Configure It
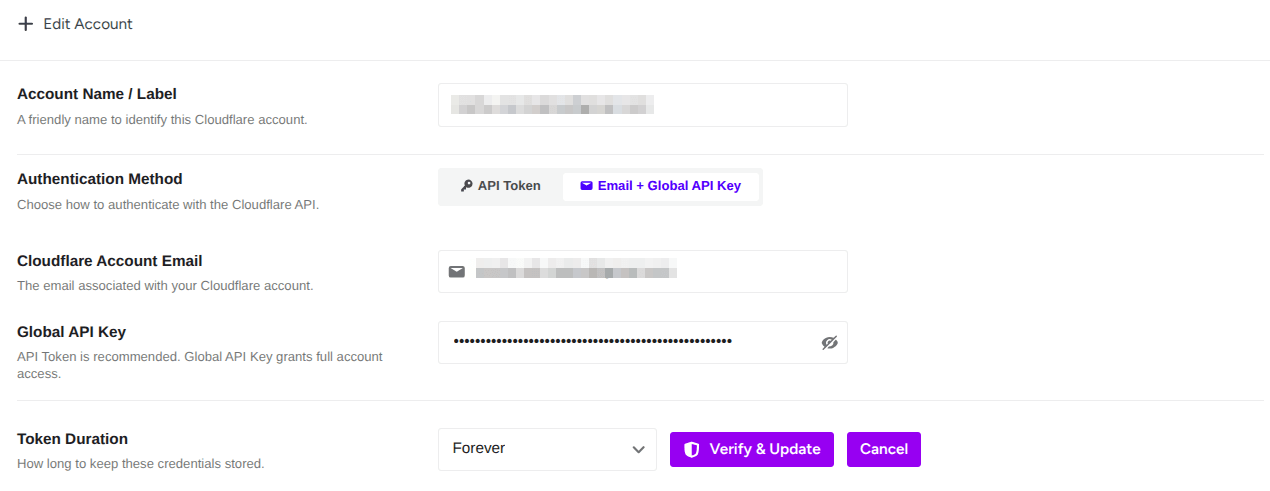
- Under Authentication Method, select API Token.
- API Token: Paste your unique Cloudflare API token into the field. Required Permissions: Your token must be created in your Cloudflare dashboard with these exact scopes:
Zone→WAF→EditandZone→Zone→Read. - Token Duration: Choose how long you want to keep these credentials securely stored from the dropdown menu.
- Click Verify & Save to validate the token permissions.
Method 2: Email + Global API Key
What It Is
The Email + Global API Key method connects your site using your master Cloudflare credentials.
Security Note: While fully operational, using a Global API Key grants full administrative access to your entire Cloudflare profile. For optimal security.
How to Configure It
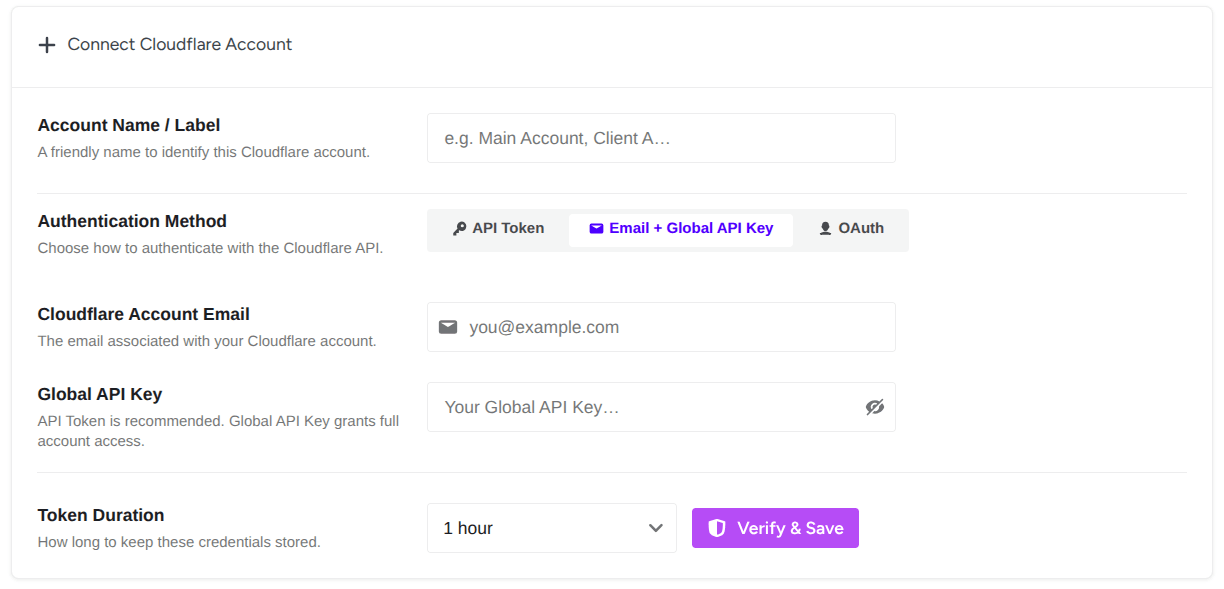
- Under Authentication Method, select Email + Global API Key.
- Cloudflare Account Email: Enter the exact email address linked to your Cloudflare profile.
- Global API Key: Paste your master Cloudflare Global API Key into the field.
- Token Duration: Choose your preferred credential storage timeframe from the dropdown menu (e.g., Forever).
- Click Verify & Save to authenticate the connection.
Method 3: OAuth
What It Is
The OAuth method authenticates with the Cloudflare API via a self-managed OAuth application. This establishes a securely scoped integration without sharing any raw account passwords or master keys.
How to Configure It
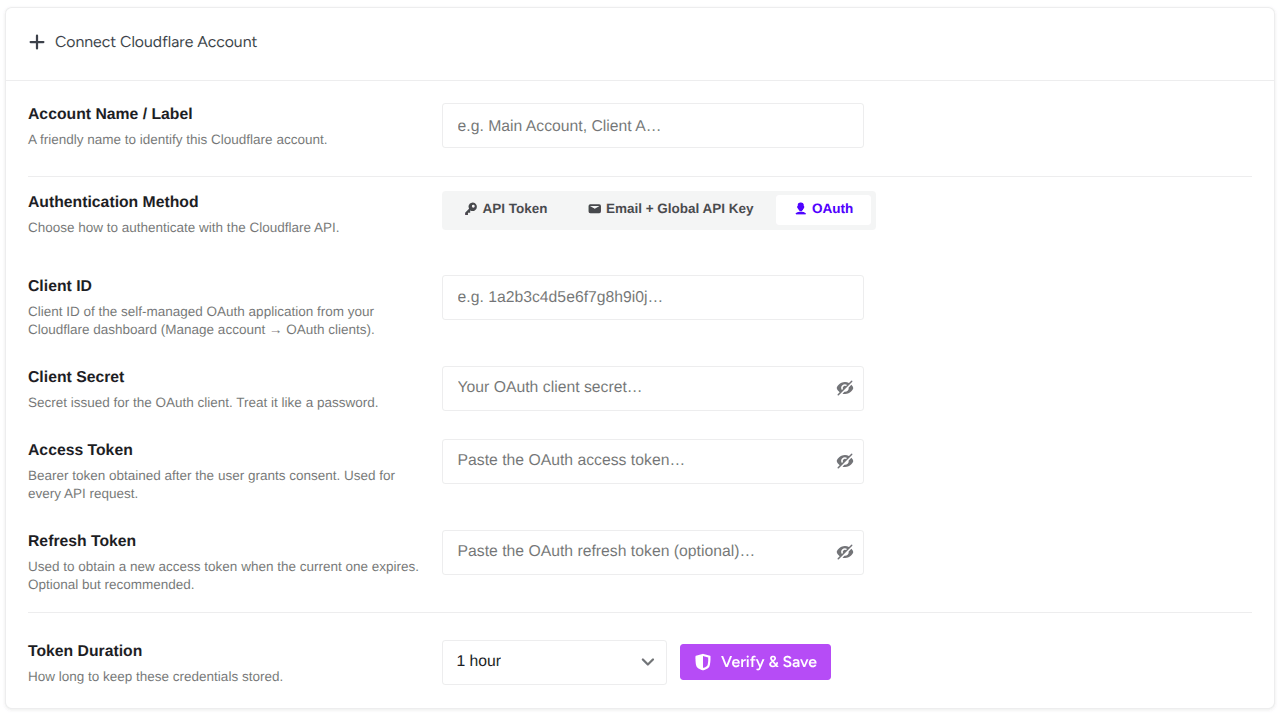
- Under Authentication Method, select OAuth.
- Client ID: Paste the Client ID from your self-managed application.Where to find it: In Cloudflare, go to Manage Account → OAuth Clients.
- Client Secret: Enter the unique secret key issued for your OAuth client. Treat this entry with the same security as a password.
- Access Token: Paste the bearer token generated after user authorization.
- Refresh Token (Optional): Enter the refresh token. Providing this is recommended so the plugin can seamlessly fetch a new access token when the current one expires.
- Token Duration: Set your credential storage duration using the dropdown menu (e.g., Forever).
- Click Verify & Save to authorize the application connection.
Finalizing Changes
After completing your chosen verification method, notice the Unsaved Changes warning bar at the top or bottom of your screen.
Click Save Changes to write your configurations permanently. You can add multiple separate Cloudflare accounts to this interface and switch between them at any time.
Quick Guide: How to get your API Token
If you aren’t sure where to find your credentials, follow these three steps:
- Log in to your Cloudflare Dashboard.
- Navigate to My Profile > API Tokens.
- Create a token using the “Edit Zone DNS” template or a custom token with the permissions mentioned above (
WAF Edit,Zone Read). - Copy the token and paste it back here in the Ultimate Security settings.
Managing Multiple Accounts
Ultimate Security supports multi-account management. You can add multiple Cloudflare accounts and switch between them at any time to manage different security zones without leaving your WordPress site.