
Custom Login URL
Change your login URL, redirect the old one, add a consent message, and put an HTTP auth gate in front of wp-admin and wp-login.php.
On this page
This page helps you protect your website by hiding your login page. By changing the address of your login page, you can stop automated robots and hackers from finding it.
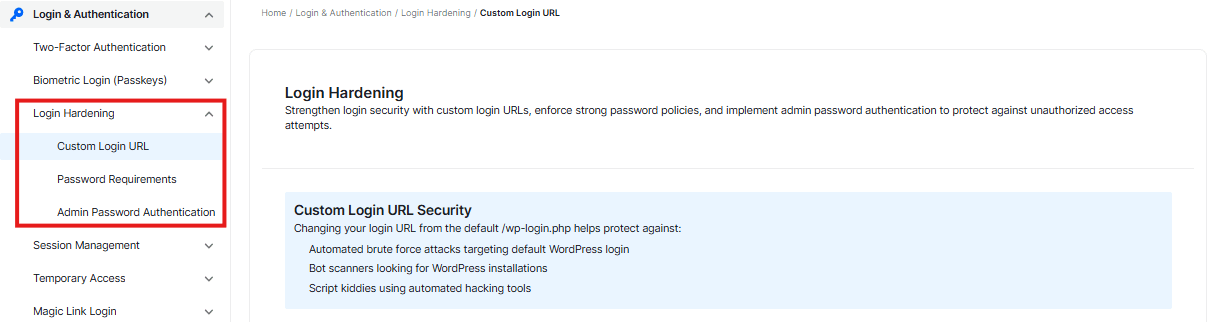
Login Page URL

Below, you will see the login page URL field.
- This displays the default address for your login page.
- In the type box, you can change the default login URL and create a new private entrance.
Old Login Page Redirect

This option lets you redirect anyone who tries to access the default WordPress login page URL
- The default setting is 404. If a bot or hacker tries the old default link, they will receive a “Page Not Found” error.
- You can also add a custom URL in the box to redirect them to another link
Show a Consent Message
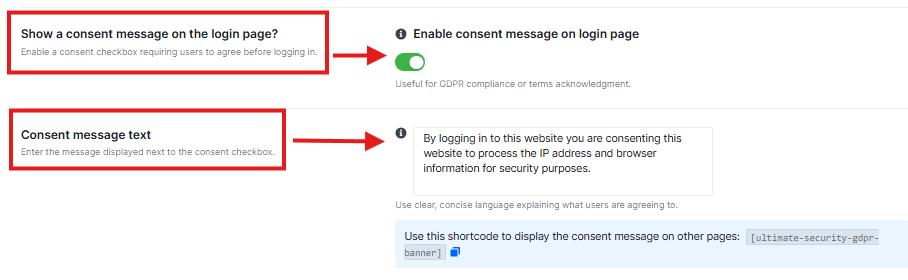
This option lets you show a custom message in the login form
- This feature has a toggle switch.
- Next to it, there is a text box containing a default message. This is the text that users will see when they reach your login page.
- You can type a custom message or welcome message here.
Login Gate (HTTP Auth)
Login Gate acts as a “security checkpoint” before you even reach your WordPress login screen. It requires a browser-level username and password. This is highly effective because most automated hacking bots aren’t programmed to handle this extra layer, so they get blocked before they can even try to guess your WordPress password.
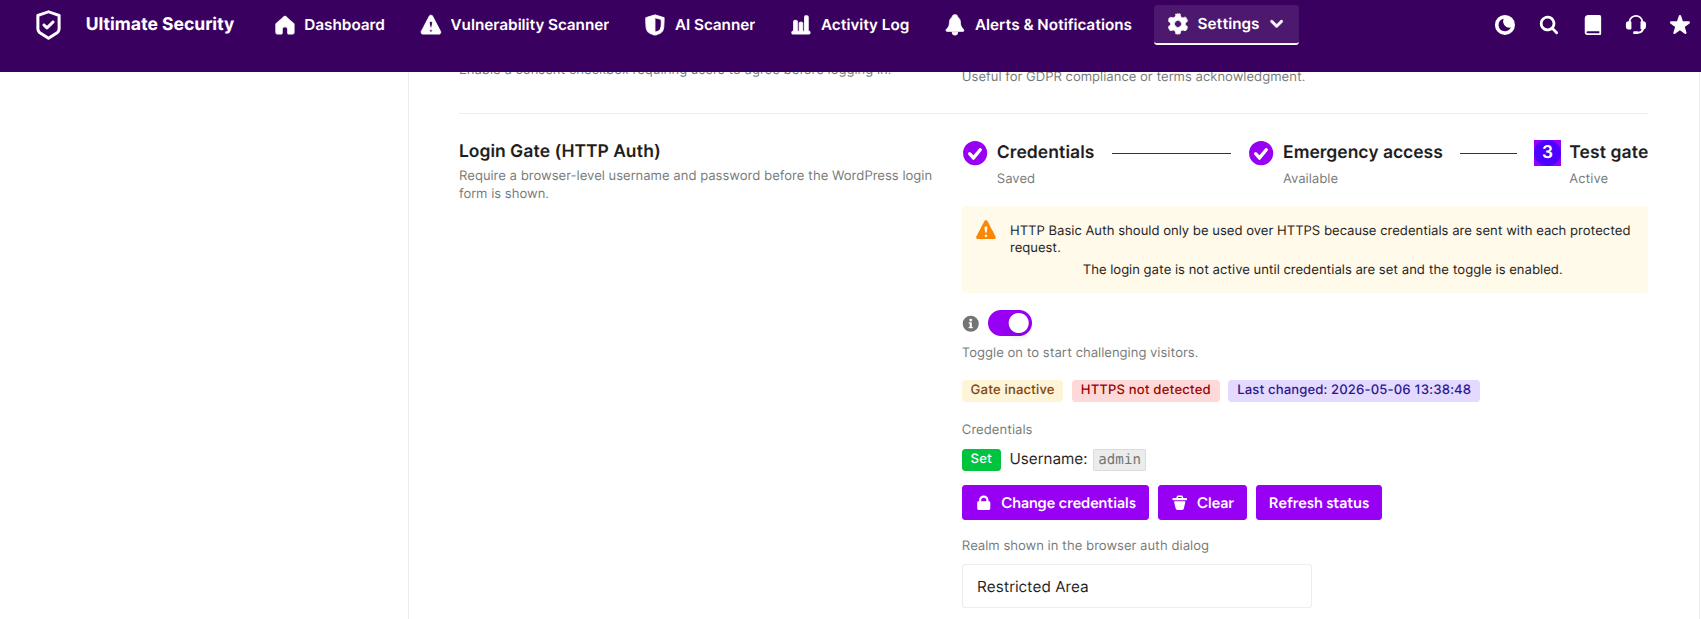
Credentials
Before you turn the gate on, you must set your access keys and enable the toggle.
- Set Credentials: Click the Set credentials button to choose the username and password you will use for this first “checkpoint.”
- HTTPS Requirement: For security, this should only be used if your site has an SSL certificate (HTTPS), as your credentials are sent with each request.
- Realm Name: You can change the “Realm shown in the browser auth dialog” (e.g., “Restricted Area”). This is the message users will see in the browser popup.
Protecting Your Paths
Enable the toggle switch. The Ultimate Security plugin automatically identifies the most vulnerable areas to protect:
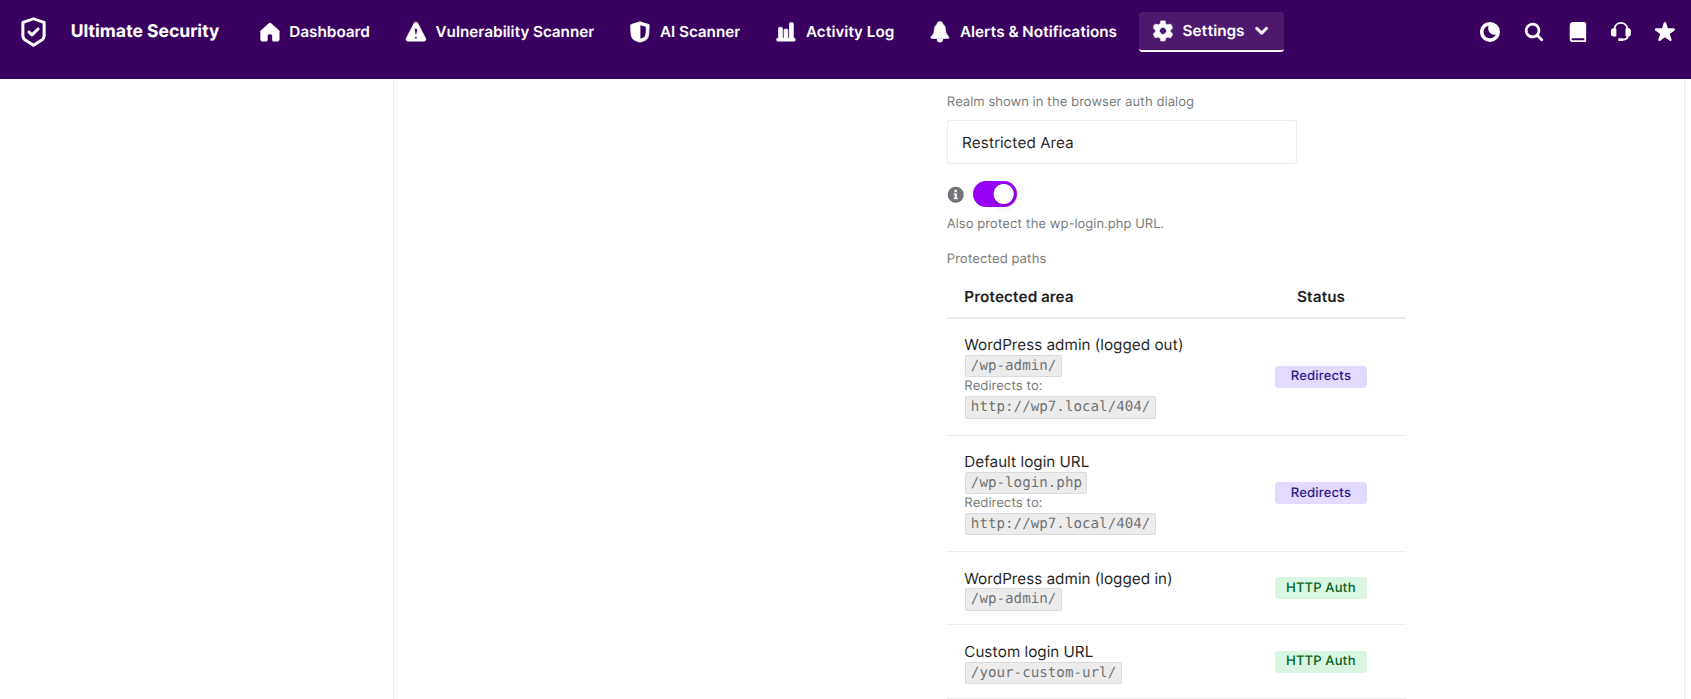
- WordPress Admin: Protects the
/wp-admin/folder. - Default Login URL: You can toggle a switch to also protect the
/wp-login.phpfile. - Status: A green badge will indicate when these areas are successfully covered by HTTP Auth.
To prevent someone from trying to guess your “Gate” password, you can configure these limits
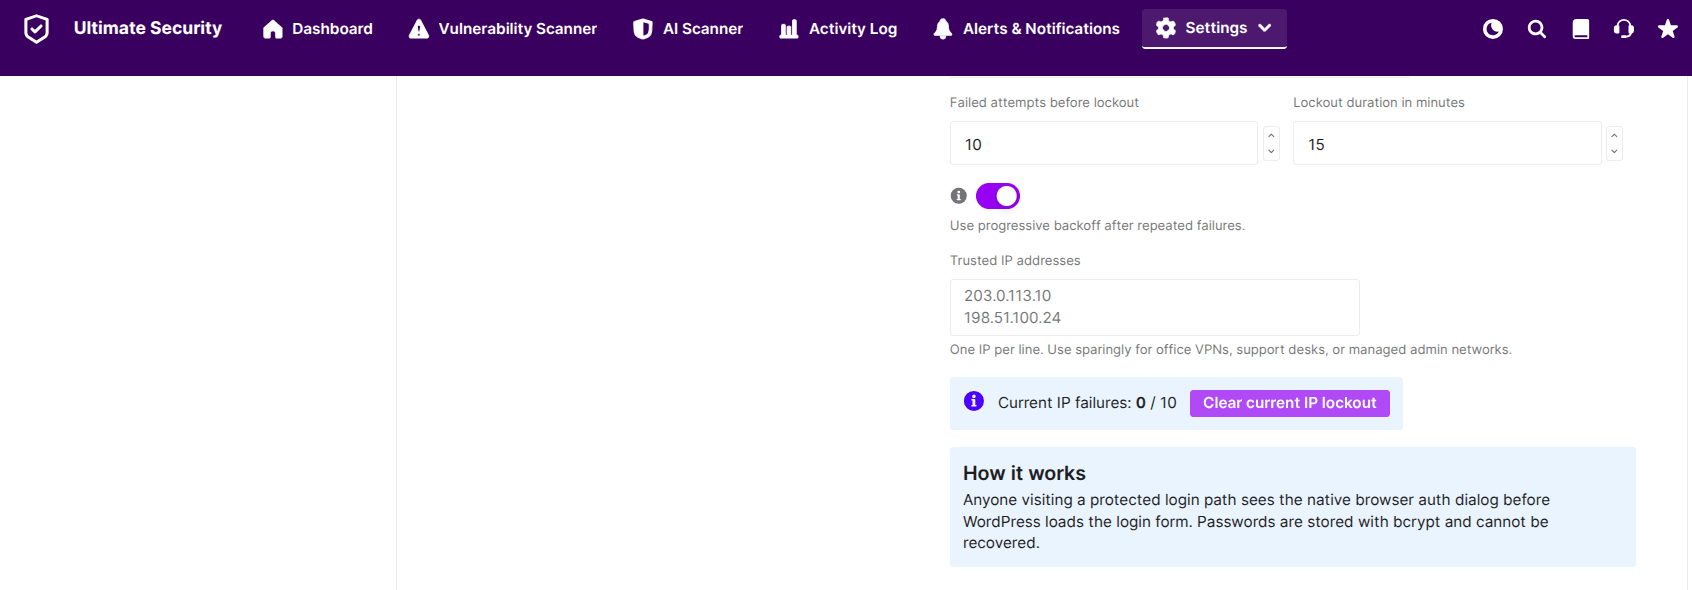
- Failed attempts before lockout: Set how many times someone can get the password wrong before being temporarily blocked (e.g., 10 attempts).
- Lockout duration: Decide how long they are blocked (e.g., 15 minutes).
- Trusted IP addresses: If you have a static IP address for your office or home, add it here. The Login Gate will “recognize” you and let you through without asking for the extra password.
Note for Beginners: Passwords for the Login Gate are stored using bcrypt encryption, which means they are highly secure and cannot be recovered if lost. Keep them in a safe place
Emergency Access
Use this Emergency Access link if you ever get locked out of your account. So keep it private and store it somewhere safe.

- Click the Generate Key button. The plugin will create a secret link just for you.
- Click the Copy button to save the deactivation link to your clipboard, and the eye button to view the existing link
Important Reminder:
- Bookmark your new custom login URL or write it down
- Save the Plugin’s Emergency Access URL for temporary deactivation
At the bottom of the section, save changes to apply