
Passkey Settings
Turn on passkeys, cap how many each user can register, choose allowed roles, and set registration and login timeouts and user verification.
On this page
The Settings tab allows administrators to manage global behavior, user permissions, and security parameters for WebAuthn passkey authentication across your WordPress site. To navigate, go to Login & Authentication → Two Factor Authentication → Passkeys → Settings.
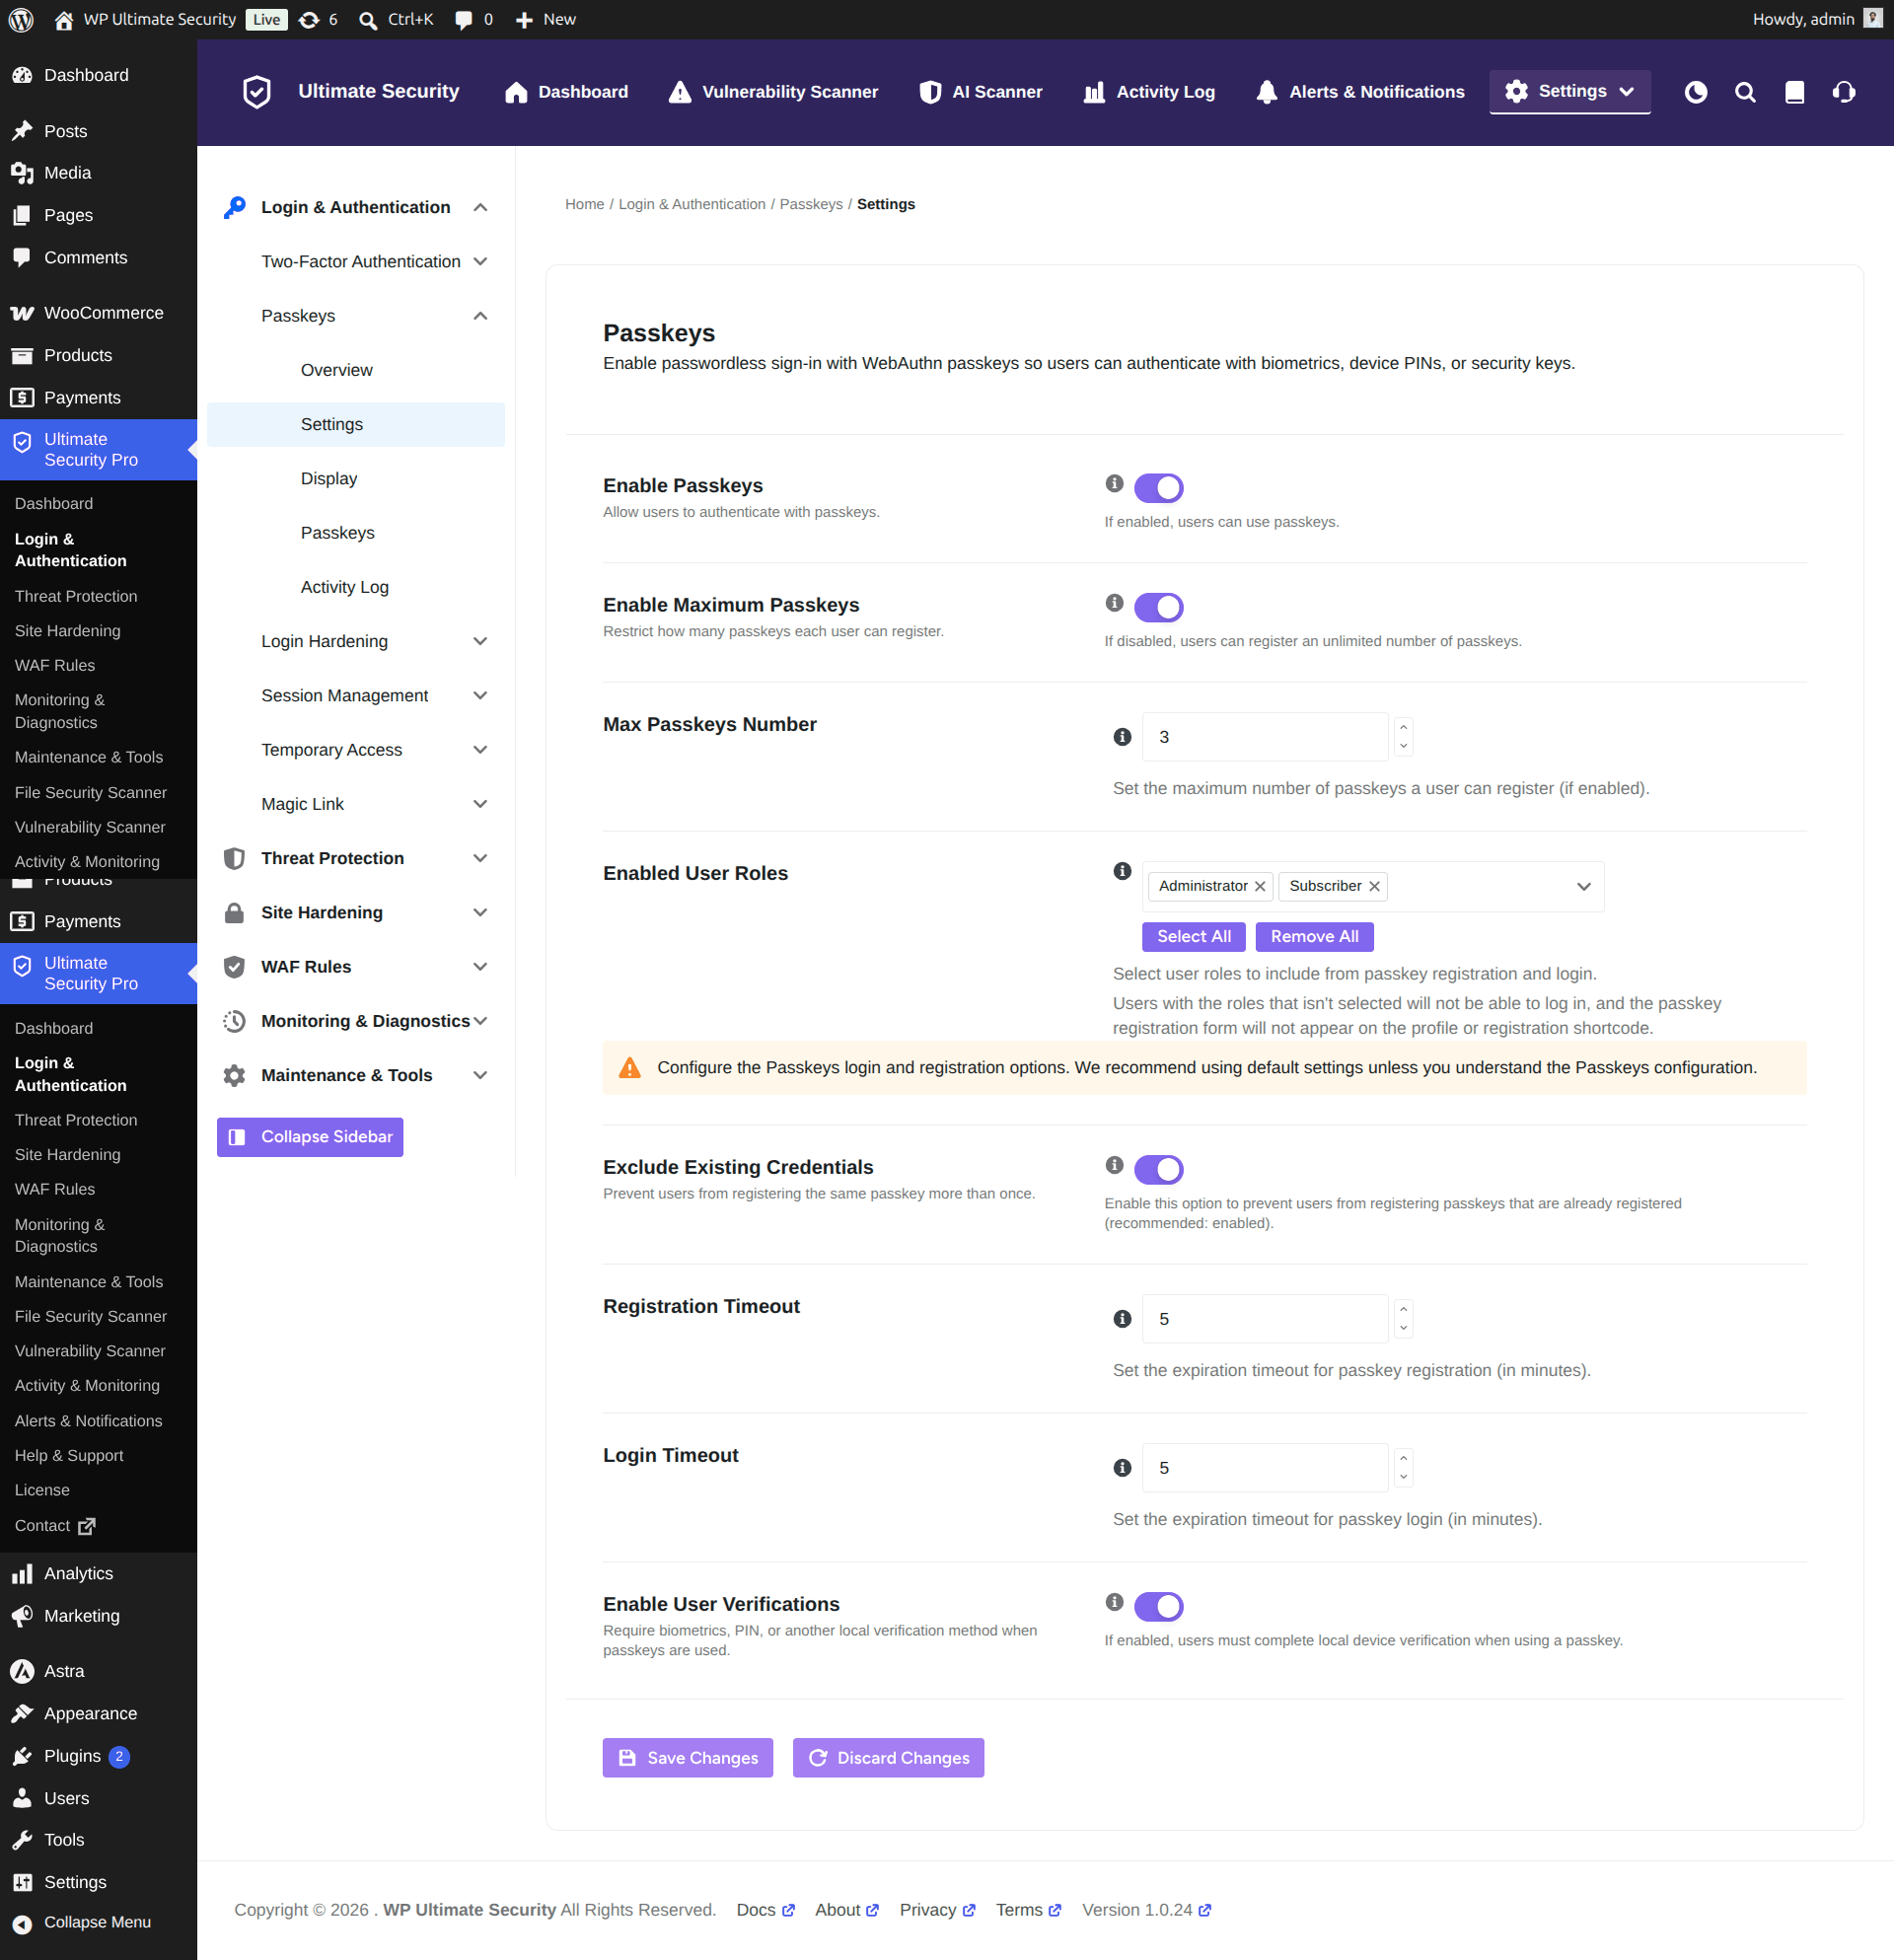
Enable Passkeys
What it does: Serves as the master switch for passwordless sign-in across your site.
How to use: Toggle ON to allow users to authenticate using biometrics (Touch ID, Face ID), device PINs, or physical security keys. Toggle OFF to suspend passkey authentication without losing saved settings.
Enable Maximum Passkeys
What it does: Controls whether users are restricted in the number of passkeys they can attach to a single account.
How to use: Toggle ON to set a registration cap per user. If disabled, users can register an unlimited number of authenticators.
Max Passkeys Number
What it does: Sets the maximum count of active passkeys allowed per account when Enable Maximum Passkeys is active.
How to use: Enter your numeric limit. Once a user reaches this limit, they must delete an existing passkey before adding a new device.
Enabled User Roles
What it does: Restricts passkey registration and sign-in capabilities to specific WordPress user roles.
How to use: Select target roles from the menu. Use Select All to grant access across all roles or Remove All to clear selections. Unselected roles will not see passkey setup options in their profile or shortcode forms.
Exclude Existing Credentials
What it does: Prevents users from registering the exact same physical device or authenticator multiple times on one account.
How to use: Keep this toggled ON to maintain clean records and prevent duplicate entry errors during authentication.
Registration Timeout
What it does: Sets the maximum time allowed for a user to complete biometric or device verification during the registration process.
How to use: Enter the duration in minutes. If the user does not authorize their device within this window, the registration process automatically cancels.
Login Timeout
What it does: Controls how long a passkey authentication request stays active on the login page before timing out.
How to use: Enter the time limit in minutes. If sign-in verification is not completed within this timeframe, the user must restart the login attempt.
Enable User Verifications
What it does: Enforces local device authorization (such as fingerprint verification, facial scan, or lock-screen PIN) whenever a passkey is used.
How to use: Keep this toggled ON to ensure physical user presence and local verification during every sign-in attempt.
Click Save Changes to immediately apply your updated configuration across your site, or click Discard Changes to undo uncommitted edits and reset back to your previously saved settings.